Full bathroom renovation step by step with pictures
I have just completed this lovely bathroom renovation in Herne Hill, London, SE24.
Scope of work included:
- demolitions of existing bathroom
- leveling to walls for tiling
- plastering and drylining to walls for tiling and decorating
- repairs and plastering to ceiling
- leveling to the floor. New sub floor – 21mm moisture resistant chipboard
- self leveling renovation screed to floor – Mapei
- waterproofing to floor with Dittra matting and Mapei waterproofing kit
- new bathroom suite installation: WC, heated towel rail, free standing bath, bath taps and new shower, shower screen, basin and taps
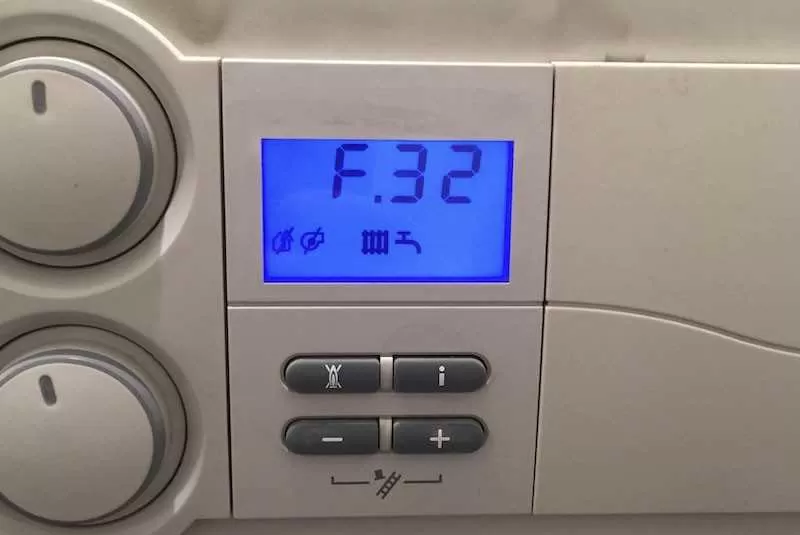
- new wiring including for: relocating extractor fan position, new shaver point, new spotlight, electric under floor heating with new spur switch and thermostat installed outside the bathroom, new pull cord light switch
- tiling to walls and floor with tiles supplied from Tons of Tiles https://www.tonsoftiles.co.uk
- decorating to walls, ceiling and timber
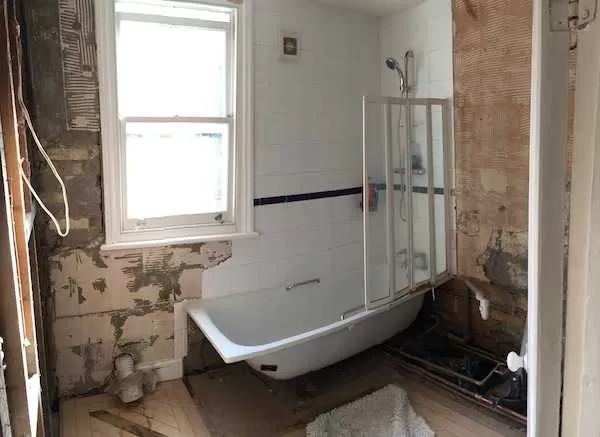
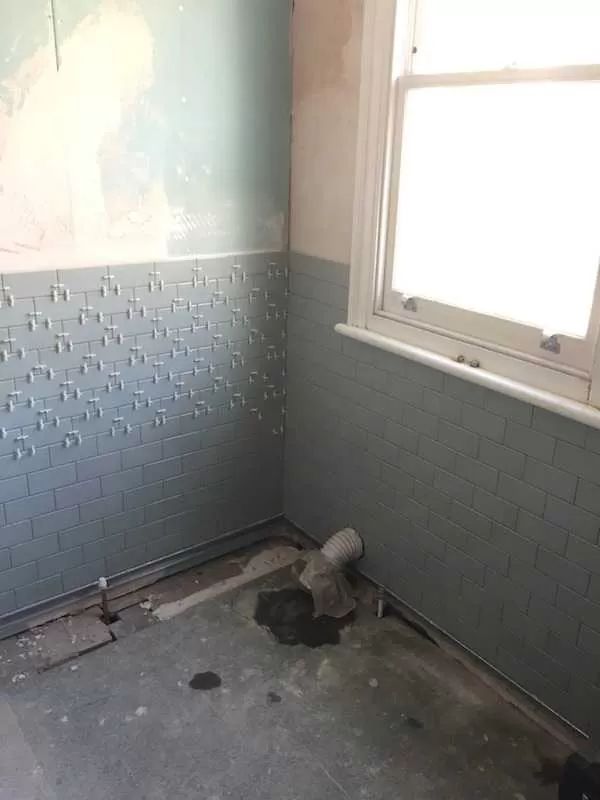
DEMOLITIONS
This is how this bathroom looked like partly demolished. There was a lot of existing copper pipework running above the floor that needed to be altered. Also walls and floor were out of true and level and not suitable for good quality finish. Existing floorboards were also not suitable for tiling.
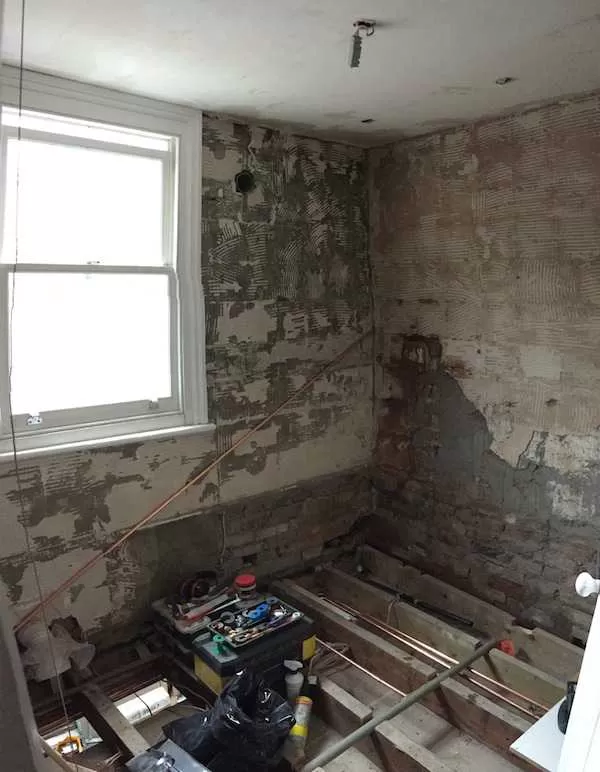
Picture below shows bathroom fully demolished with all plumbing and floor boards removed. At this stage ceiling has been replastered with rendering mesh bonded on dry wall adhesive prior to the skim coat to avoid cracks in the future.
PREPARATION TO FLOORS AND WALLS
Since existing floor joists were not level I fixed 2 x 4 timbers to existing joists and installed 21mm moisture resistant chipboard. I have also run my hot and cold water supplies in 15mm copper run in lagging to new locations of bath and basin. Nice level floor ready for priming, self leveling screed and waterproofing. Note how I marked pipe runs on top of flooring to avoid going through pipework when fixing boards down with 5x50mm screws.

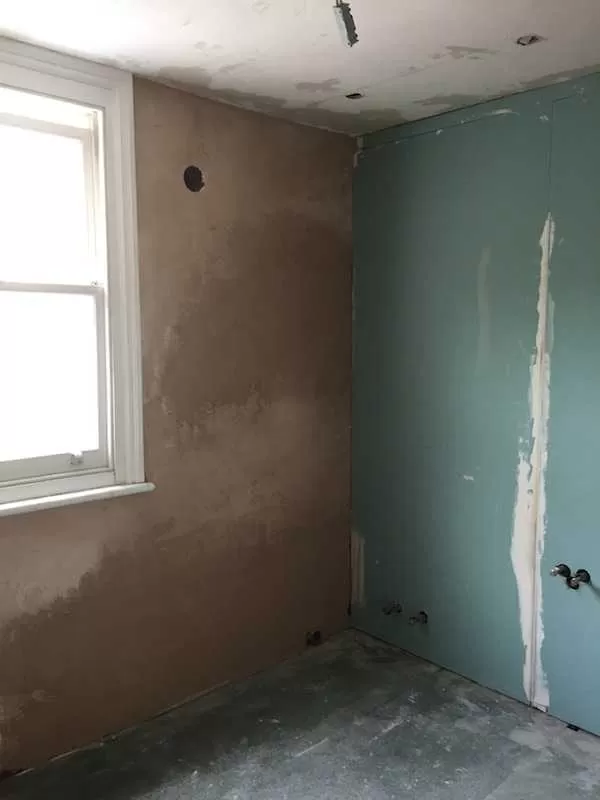
Once I had my flooring boards down it was time to take care of walls. I decided to use 2 different methods for leveling to walls. For the wall with the window I will render it using either Mapei tile adhesive or mortar. For the wall with lagged copper pipes I decided to ‘dot and dab’ moisture resistant plasterbaord. The reason for doing that wall in ‘dot and dab’ was the fact that it was approximately 40mm out of plumb and rendering would be much more difficult. Wall with the window only needed minor adjustments.
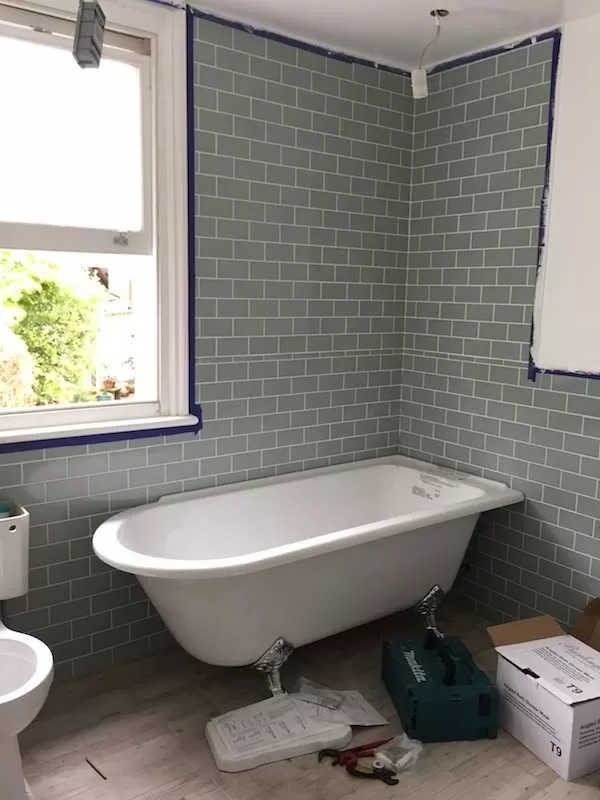
With my floors and walls leveled it was time for tiling. Please note that at this stage I have also done my 1st fix plumbing and electrics.
TILING AND WATERPROOFING
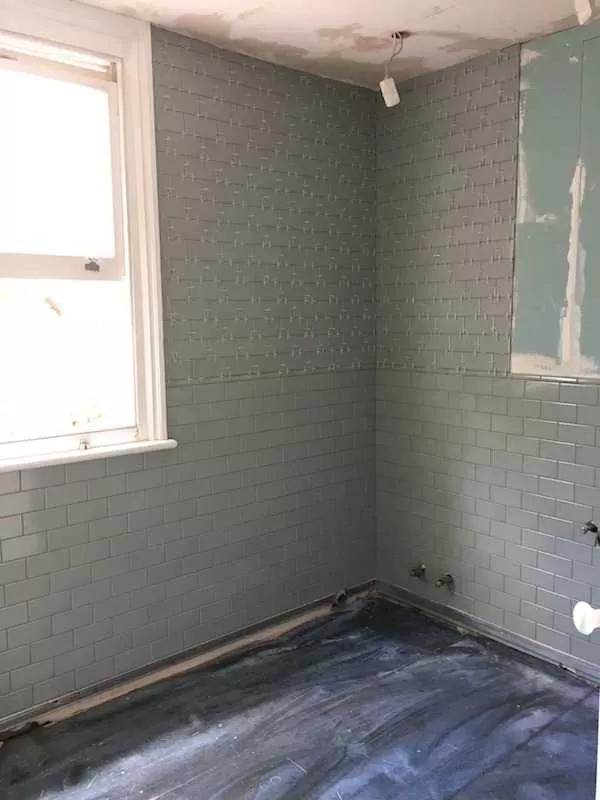
I start tiling with installing horizontal guides for the 2nd row of walls tiles. To set my levels I use laser self leveling level and fix metal channels horizontally to walls. I usually use metal channels normally used for suspended ceiling as they are cheap, light and rigid. Simply perfect for this application. On this next picture you can clearly see 2 metal channels under the tiling.
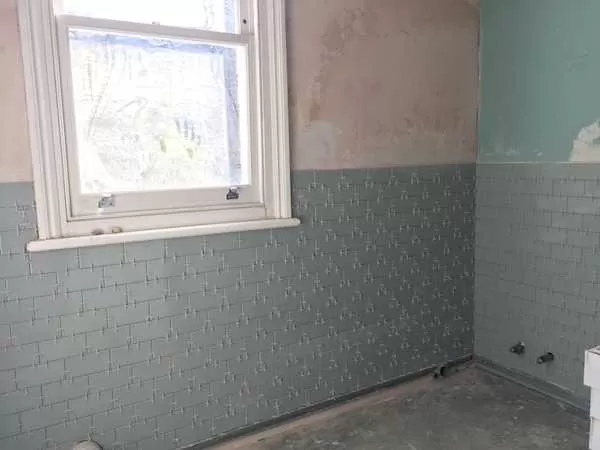
And another shot showing walls tiling with metal C channels that the first row of tiles seat on.
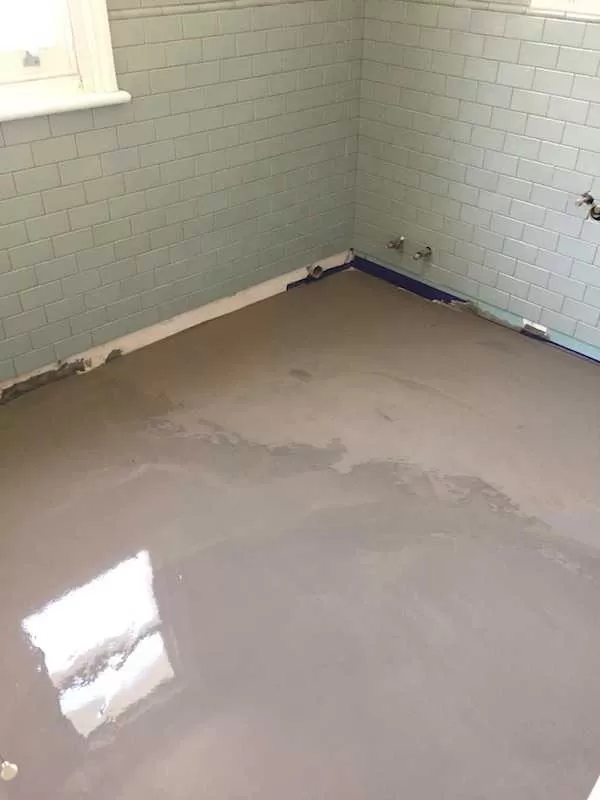
Next pictures shows walls fully tiled and floor primed prior to application of self leveling screed. Although joists were already leveled adding fiber reinforced screed makes tiling much easier and additionally reinforces timber floor.
Next step, Mapei self leveling renovation screed applied to the floor.
Although self leveling screed is safe to walk on after just few hours it is best to allow 24 hours before other work is done to the floor. Hey, early finish today 😉
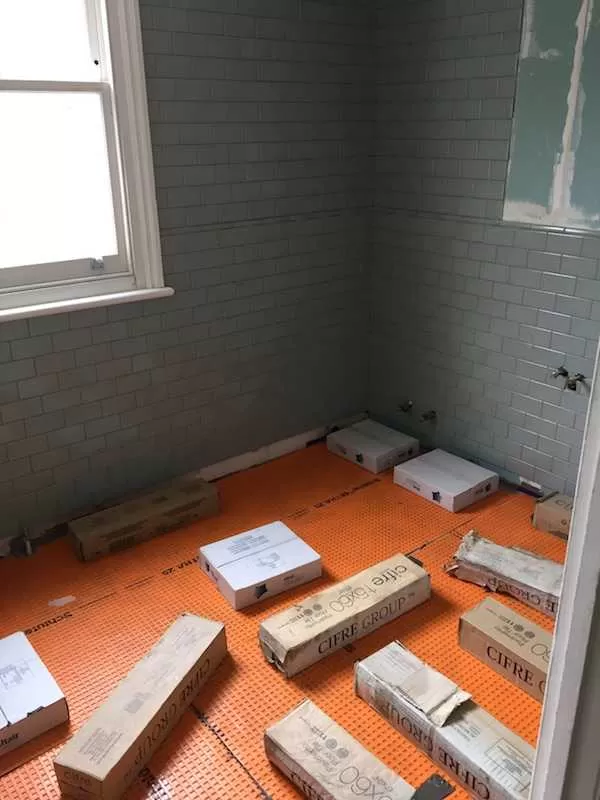
Next day I installed electric underfloor heating matt to the floor and Dittra decoupling matt on top of the matt. Next picture shows dittra matting being weighted down by boxes of tiles.
With Dittra matt down it was tile to tile the floor. This floor gets tiled with wood effect tiles from Tons of Tiles.

Last tiles that get installed are the bottom row of wall tiles once the floor tiles are down. Grouted walls and floors on next picture.

PLUMBING 2nd FIX
With tiles installed, sealed and grouted. (We used crackled glazed tiles for walls and those require special sealant prior to grouting) it was time to decorate walls and install sanitaryware.
Another shot of 2nd fix plumbing.
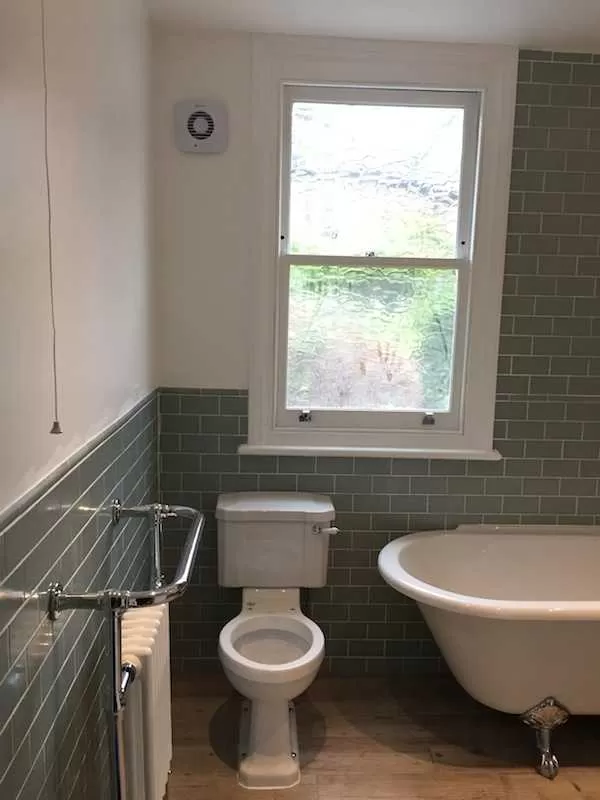
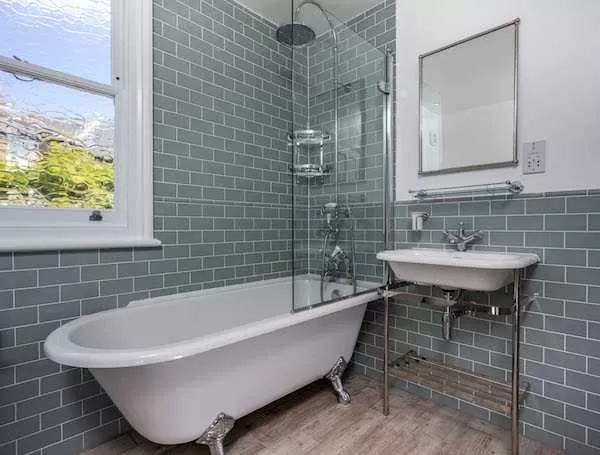
Last steps of bathroom installation: silicone seals around new WC pan, bath edges, basin and in all internal tiling corners followed by fixtures installation: mirror, shelves, etc.
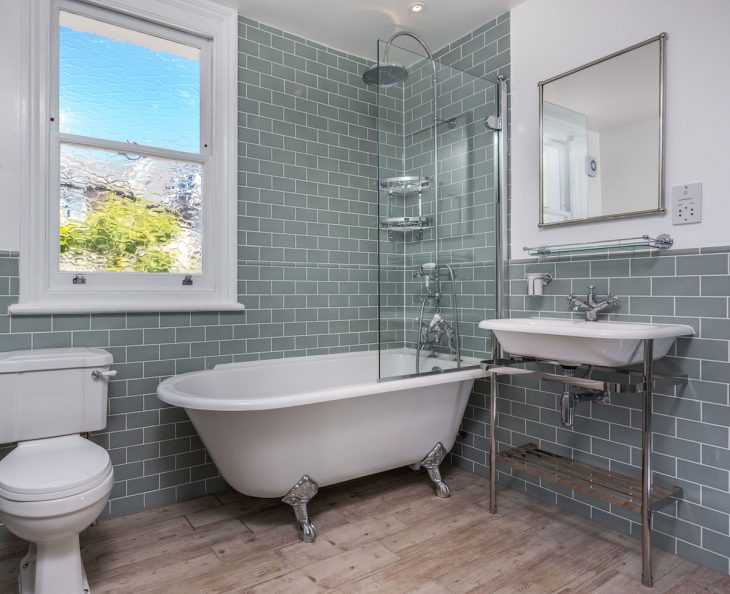
Fully renovated family bathroom below.
How do you like final results? Comment below with any criticism or praise you may have!